How to Upgrade Your Data
Upgrading In 2 Easy Steps
Before You Begin
💡 Pro-Tip: Preserve Your Paper Trail
Before you finalize your upgrade, remember: in family law, your data is your best defense. We strongly recommend archiving your previous workbooks in a dedicated "Legacy" folder within your Google Drive rather than deleting them.
Data transfers are generally seamless, but think of your old file as your "Black Box" backup. Keeping the original record ensures that if an export or import is ever corrupted, your timestamped, legal-ready evidence remains 100% intact and retrievable.
📂 Expert Organization Tip
To keep your archives "audit-ready" for an attorney or mediator, avoid generic filenames like "Copy of Parent Record". Use a specific date-range format so you can locate specific evidence in seconds:
Recommended Format: Archive_ParentRecord_YYYY-MM-DD_to_YYYY-MM-DD
Example: Archive_CustodyLog_2025-01-01_to_2026-02-11
Why it works: This naming convention creates a chronological "Status Quo" history that is easy for legal teams to navigate without opening multiple files.
Step 1: Export your data.
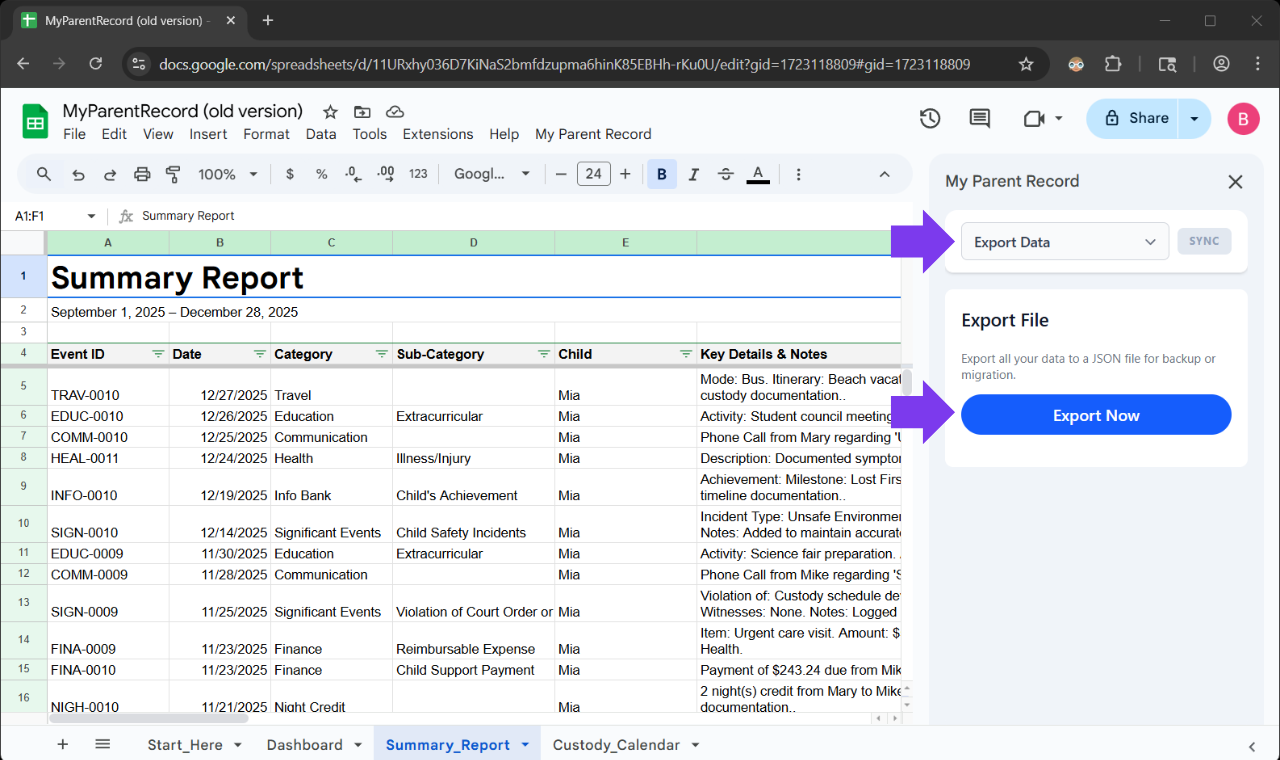
- Open your existing workbook.
- In the Verascribe Guardian sidebar menu, select “Export Data”.
- Click the “Export Now” button.
- Choose a location to save your workbook data to your computer.
- Click “Save”.
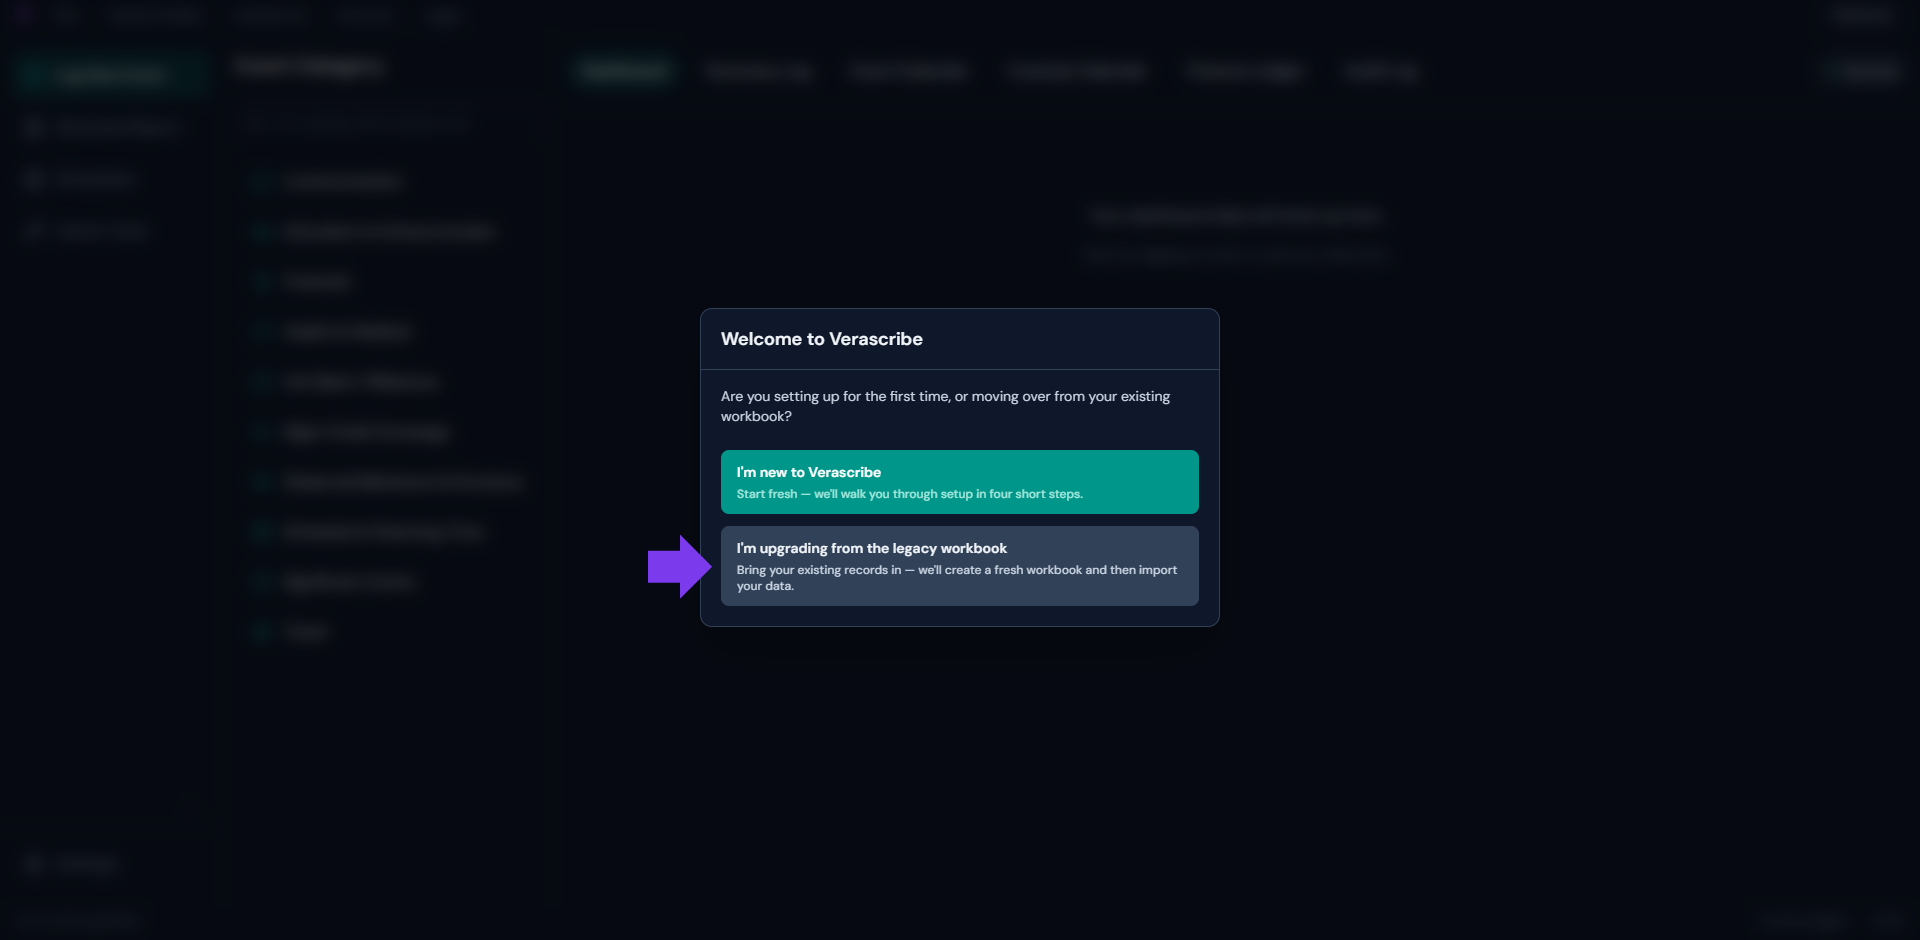
Step 2: Launch the New Webapp.
Before you launch
-
Use the right Google account
Your records are tied to the account you sign in with. If you're signed into more than one Google account, sign out of the others first — or open the app in a private/incognito window — so the right account is used. Google doesn't always ask which one.
-
Use a personal Google account
A personal @gmail.com works best. Work or school accounts are often blocked by an administrator.
-
Bookmark the app to get back later
The app opens at app.myverascribe.com. Bookmark it now — that's how you return anytime, on any device.
-
Use a desktop or laptop
Chrome, Edge, Firefox, or Safari. Mobile and tablet support is coming soon.
- Ensure you are signed into only one Google account. This is important because you will not be able to move your workbook to a different account later.
- Launch the webapp at https://app.myverascribe.com
- Select "I'm upgrading from the legacy workbook".
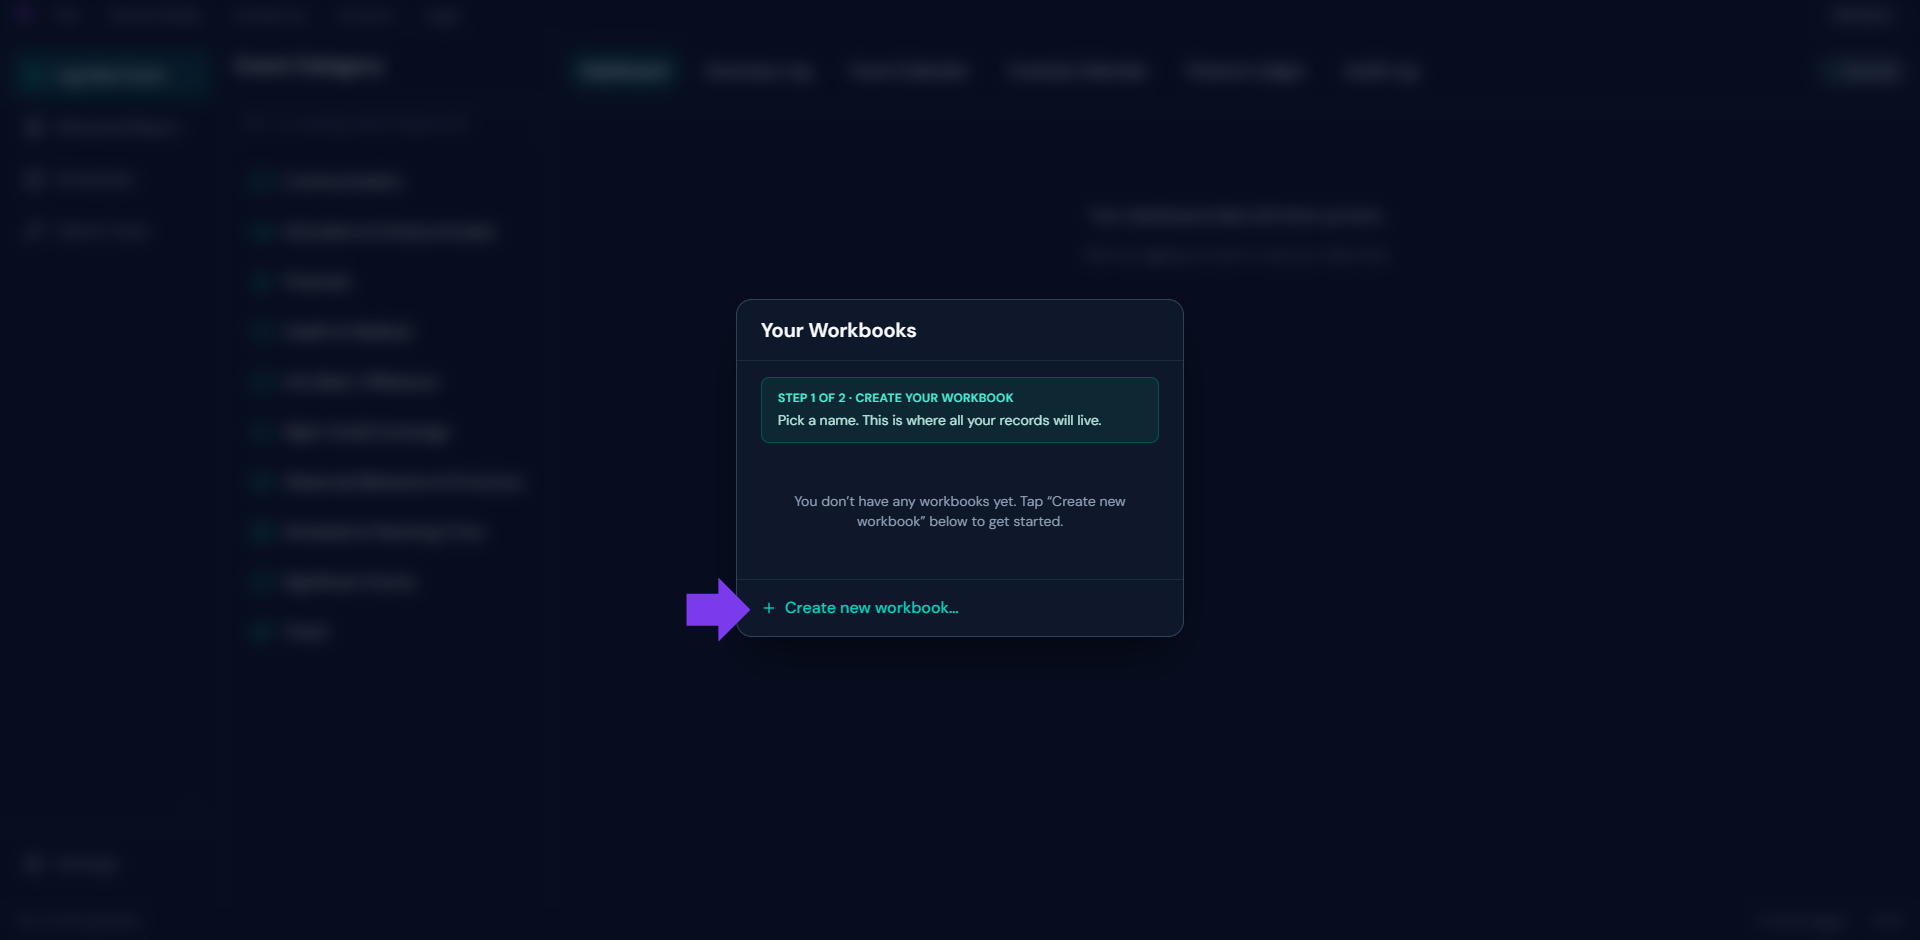
- Create a new workbook and give it a descriptive name.
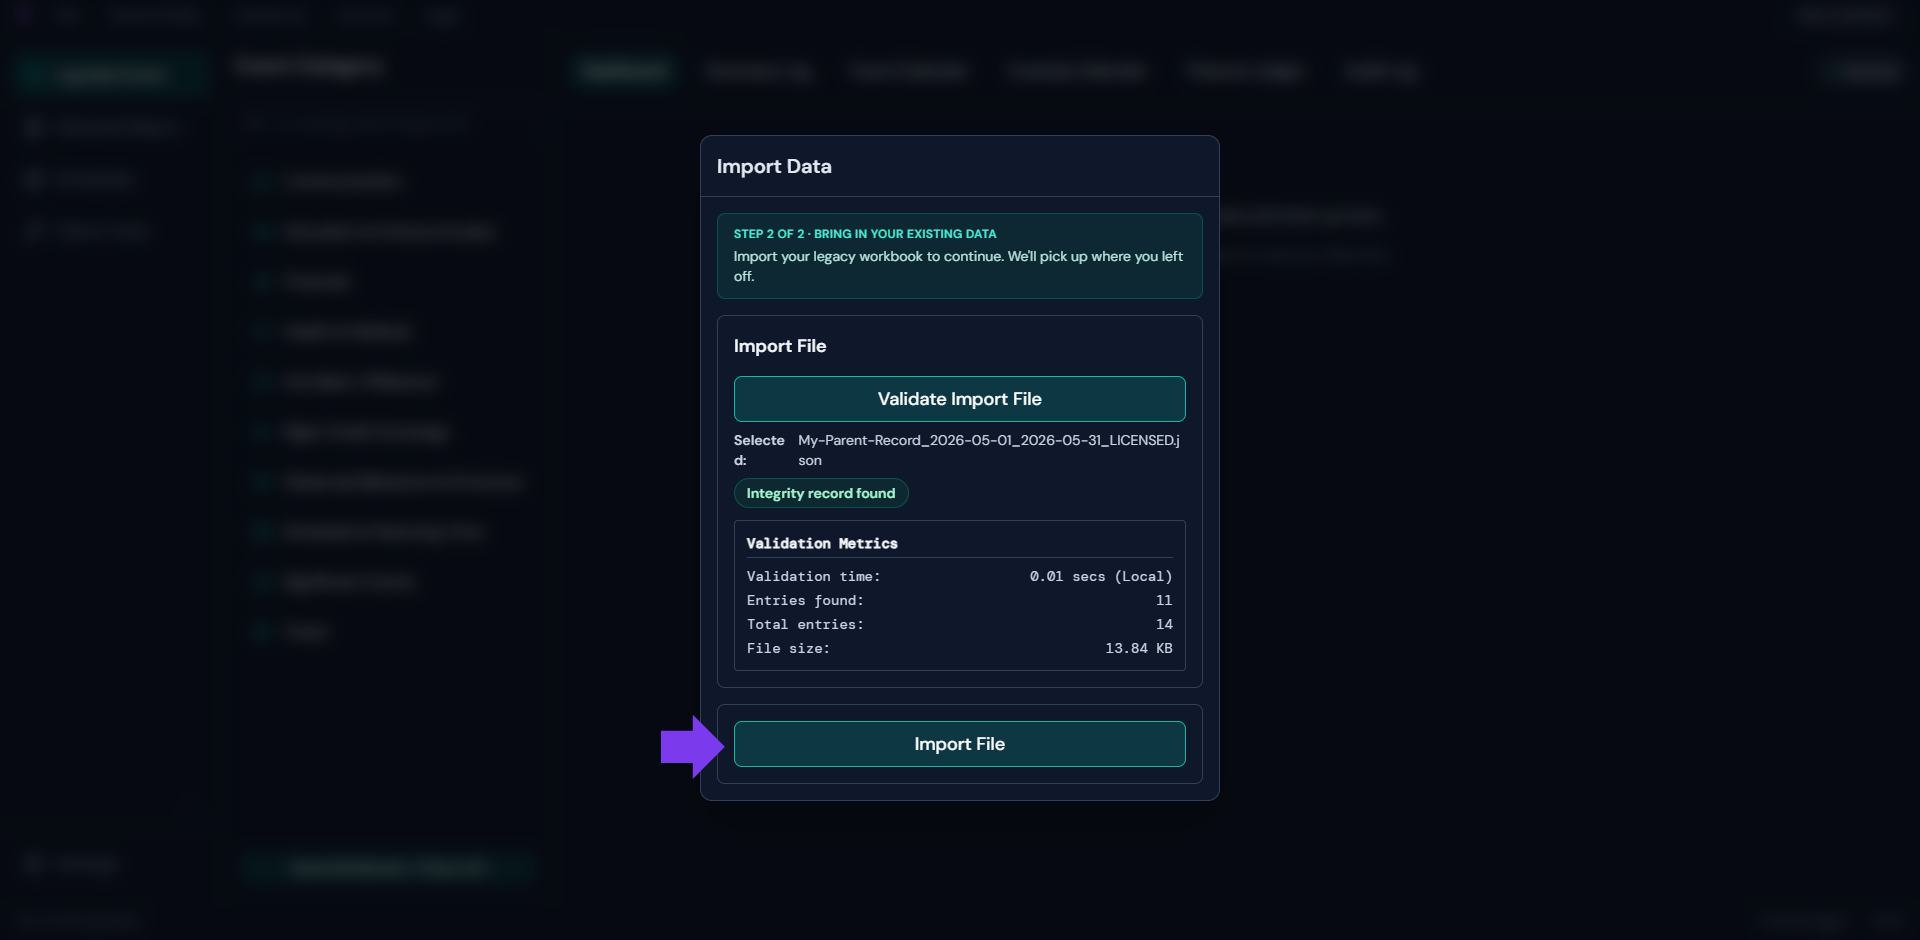
- Select the file that was exported in Step 1.
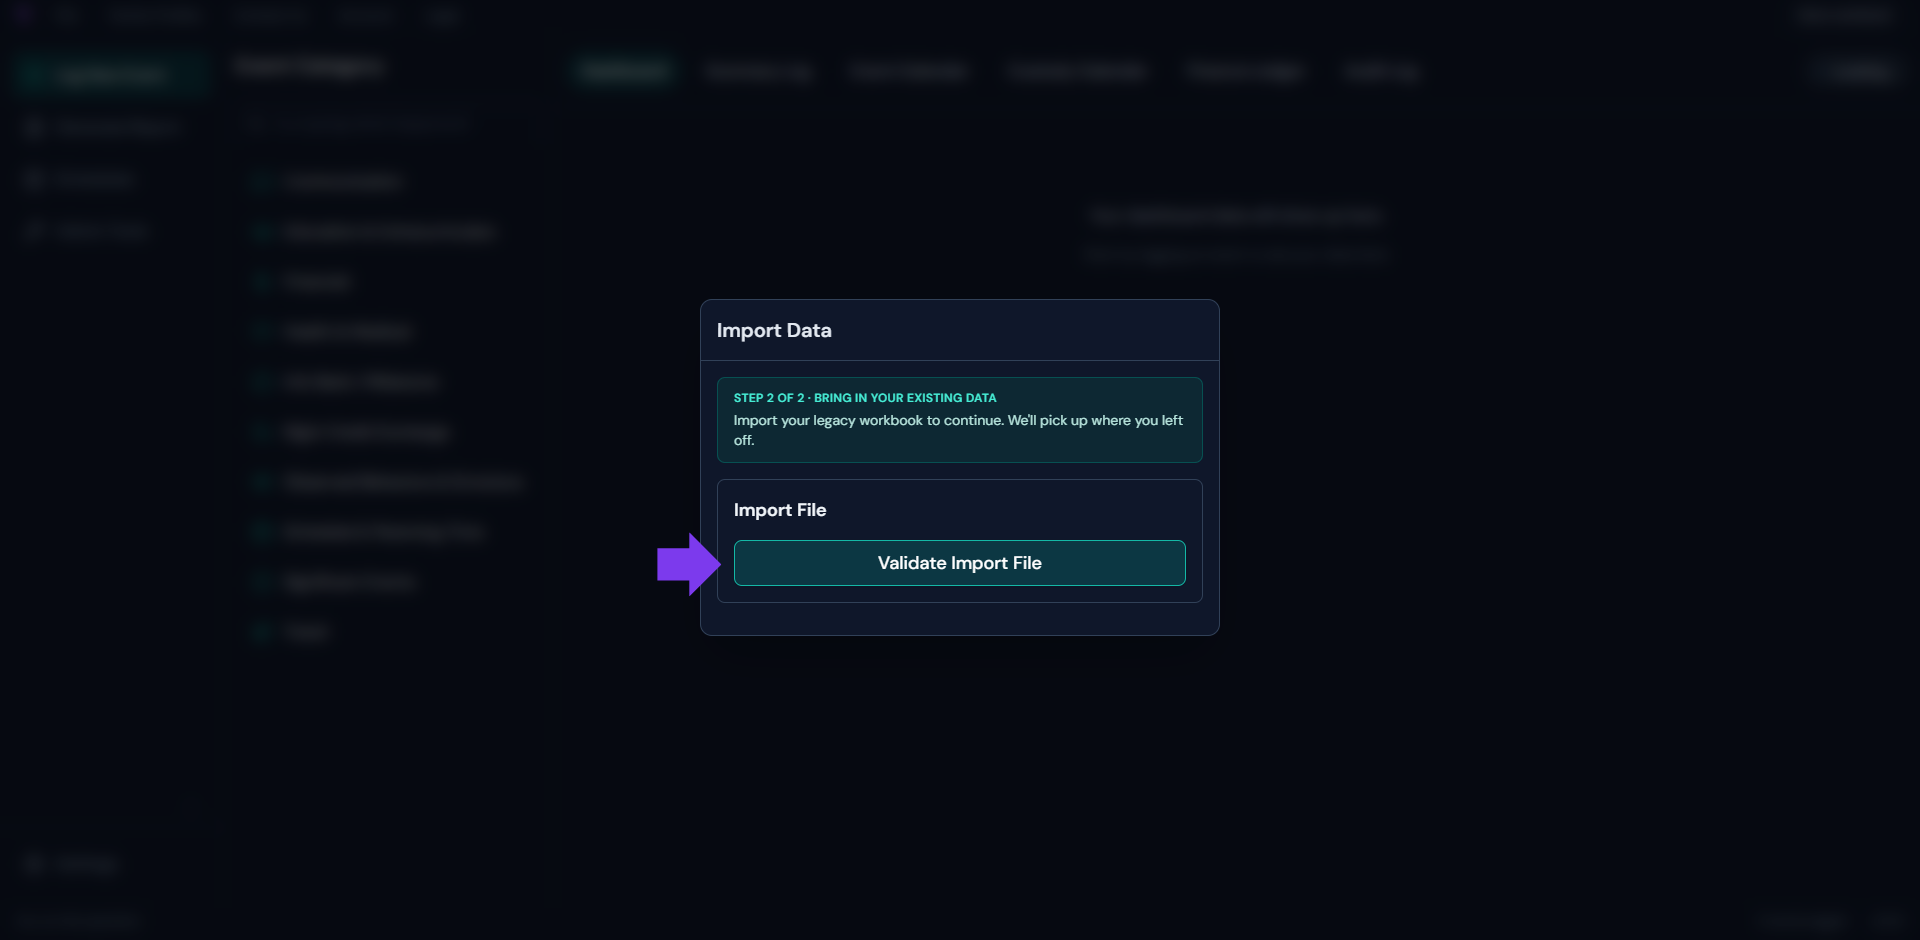
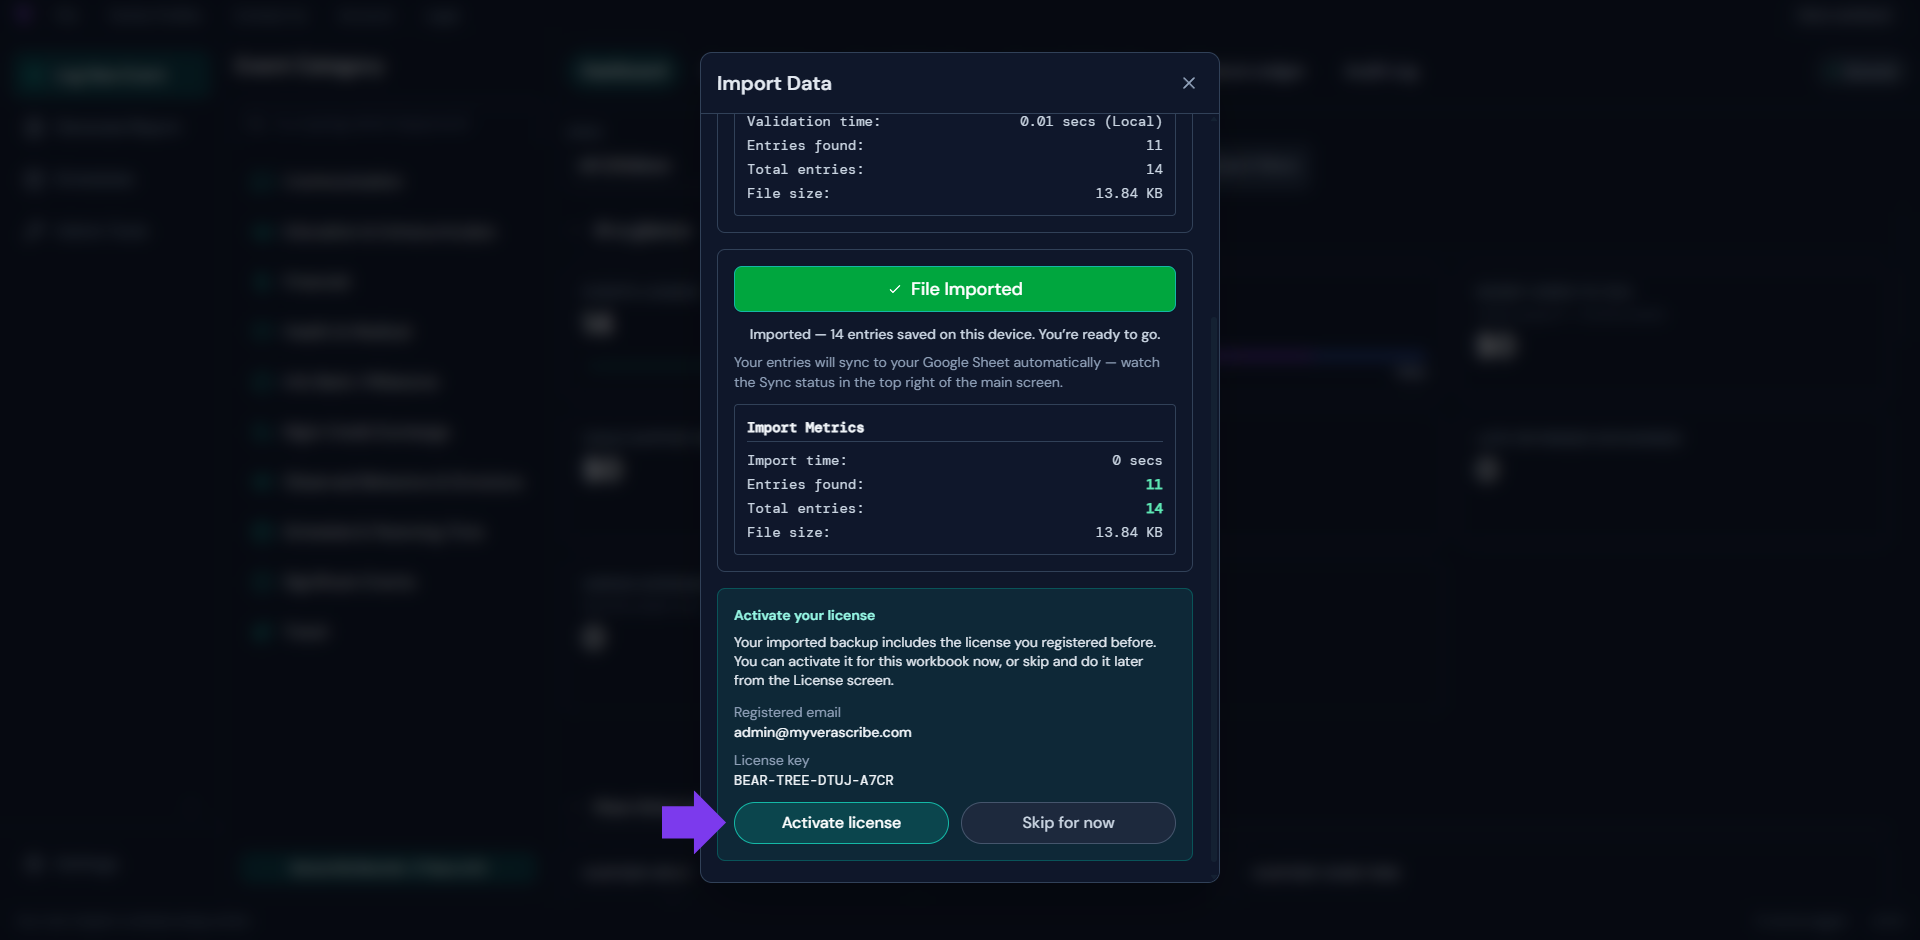
- If the import is valid, click "Import File". The import will begin and may take a few minutes.
- Import will detect your existing license in the file. Click activate license to register your webapp.
Note: Pre-v2.1.0 Data
If you are migrating from a version prior to v2.1.0, you will see a warning message indicating that some data columns are missing. This is to be expected and does not indicate an error.
- Payment_Method column was added in 2.1.0 to support the addition of Personal Expenses tracking.
- Schedule_End_Date column was added in 2.1.0 to support the addition of flexible scheduling.
- Reported_To column was added in 2.4.0 to support the addition of Domestic Violence Incident tracking.